- Home ›
- Watercolour wildlife art ›
- Watercolour gorilla
My "gentle giant" watercolour gorilla painting
My latest watercolour gorilla painting is an example, and a large one at that - painted on a full sheet of watercolour paper, 70 cm tall by 100 cm wide - of how limited palette watercolour paintings don't have to be boring. Dull. Or subdued in any way in their impact.
In fact, limiting yourself to a palette of just a few well chosen colours gives you so much less to worry about whilst painting and will tie the whole painting together. But you will need to find out which ones work well together by playing on scrap paper before you start painting for real! Especially if it's going to be a large painting. The first few brush strokes aren't a good time to find out that that favourite blue of yours makes a horrible "mud" with that red you love!
My limited watercolour palette colours
The whole painting was painted using three colours:
- Prussian Blue,
- Burnt Umber, and
- Light Oxide Red.
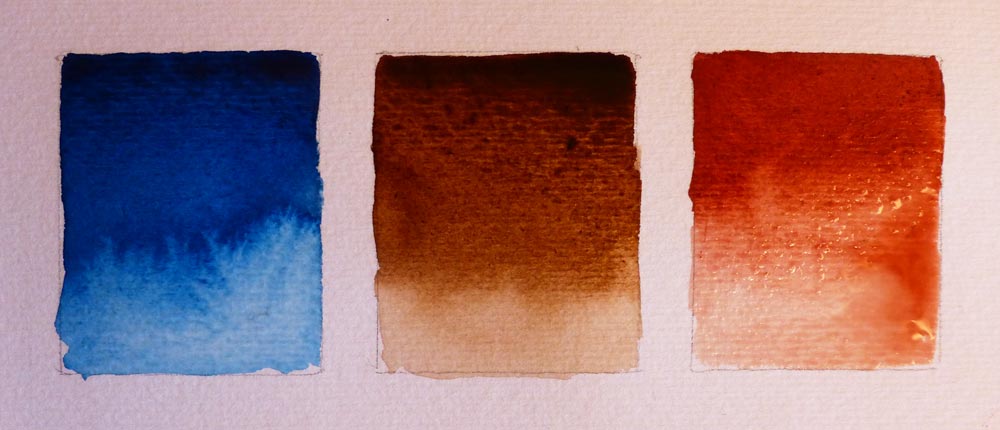
Well, four really, as I also used Burnt Sienna just once (see below).
The product links in this page are "affiliate links". If you click on them and make a purchase, I may earn a small commission at no cost to you. I only recommend products that I use myself and have no doubt that you will love too. More information can be found in my disclosure policy.
All by Royal Talens from their fabulous Van Gogh range.
Prussian Blue is definitely one of my favourite watercolour pigments and one I turn to day after day. I love its intensity at one end of the scale and its delicate transparency at the other. The way it mixes with Yellow Ochre to make gorgeous natural greens and Burnt Umber to make deep, interesting darks.
TIP
The pigment Prussian blue is what I describe to my watercolour students here in Italy as a, "un bambino di due anni che non vuole muoversi" - a baby of two years old who doesn't want to move. In other words a "terrible two's toddler". Once he has sat down, he won't want to budge.
It's one of those colours that stains the paper quickly. So, when using in combination with a second pigment - so long as it doesn't stain worse! - I put the second colour down first. In this case the Burnt Umber, and charge in the Prussian blue. That way I have a little more "wiggle room" - time to move/mix - the pigments to my liking.
You can't miss the Light Oxide Red in the background obviously! But I also used it sparingly in watery washes to warm up the gorillas skin tones (Prussian blue is a cold blue) and to give three dimensional form to his face and body.
A little colour theory: cool colours recede and warm colours advance.
The stages of painting my watercolour gorilla portrait
Step 1: masking fluid
The first step was to carefully paint masking fluid around the outline of his body.
This gave me the opportunity to come up close with a large brush and not have to fiddle with negatively painting around the strands of his back-lit hair when I came to paint in the background. It still needed to take care in doing so, so as not to go over the masking fluid into what needs to be left as pure white paper, but nonetheless it enabled me to achieve what I wanted to with the background in one application.
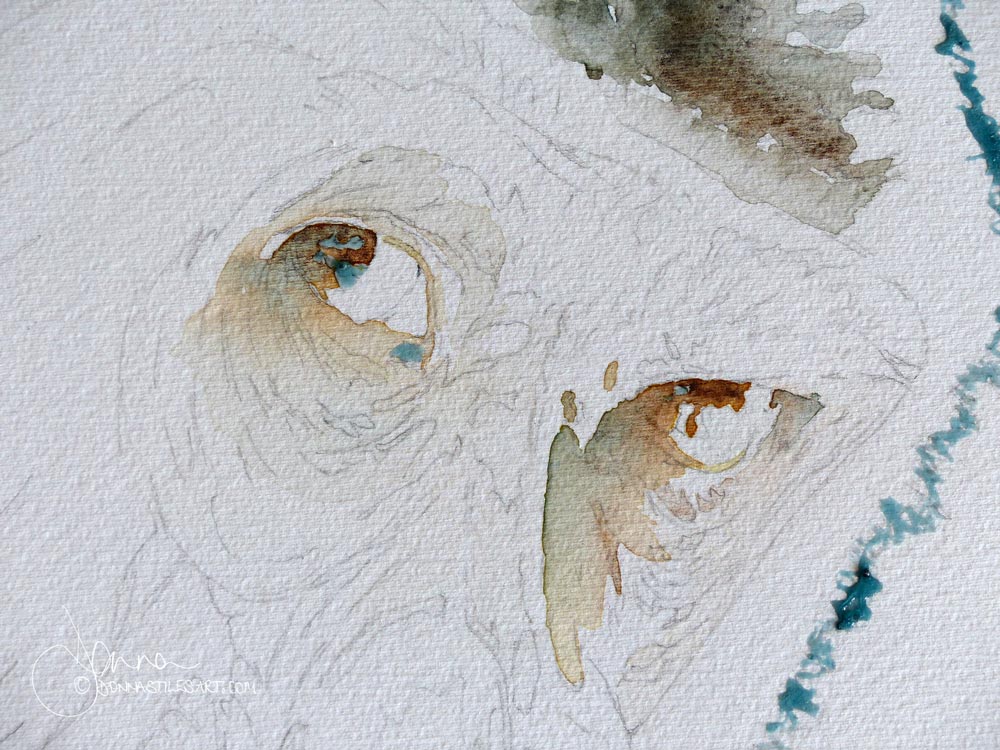
I also applied the masking fluid to the areas in his eyes that I wanted to protect: the white reflections in the pupils of his eyes.
The eyes are the focal point of this painting and in every portrait that I paint. They are normally the areas where the maximum tonal contrast occurs. So it pays dividends to plan ahead before starting to paint and to protect what will be in the final painting the whitest of white areas.
Once they are gone it is very difficult to get them back. It's not that the whole of those areas will necessarily remain pure white, but by masking them out I retain the choice to adjust them, or not, later.
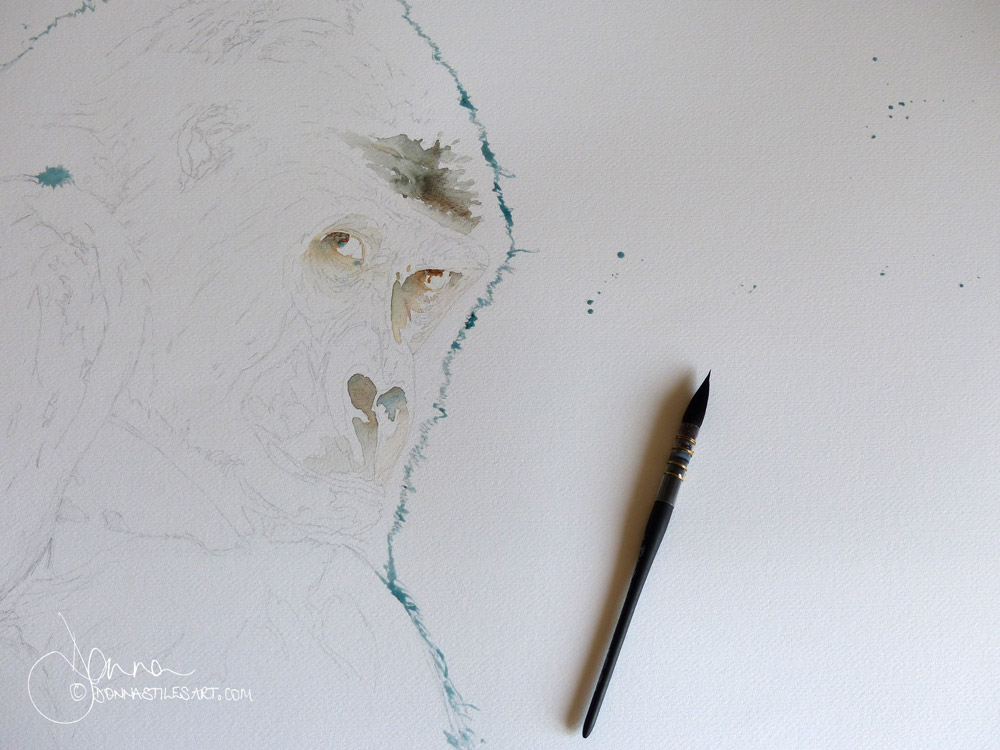
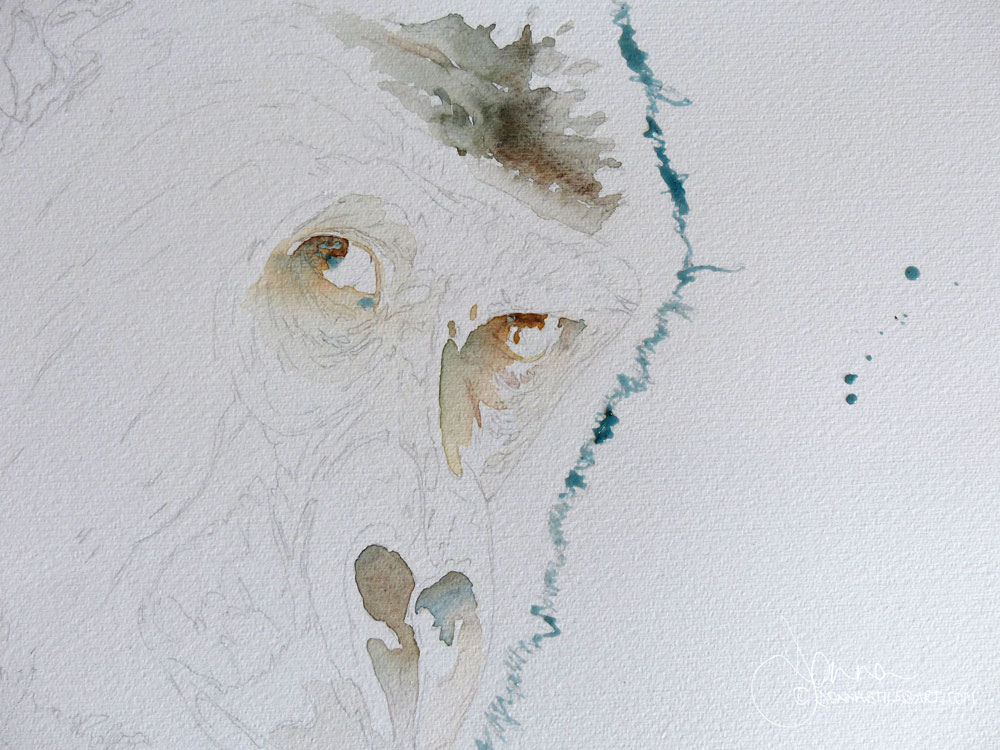
Step 2: the eyes
With the masking fluid dry, I painted the eyes and the first washes in his nose and above his eyebrows.
I always paint the eyes first.
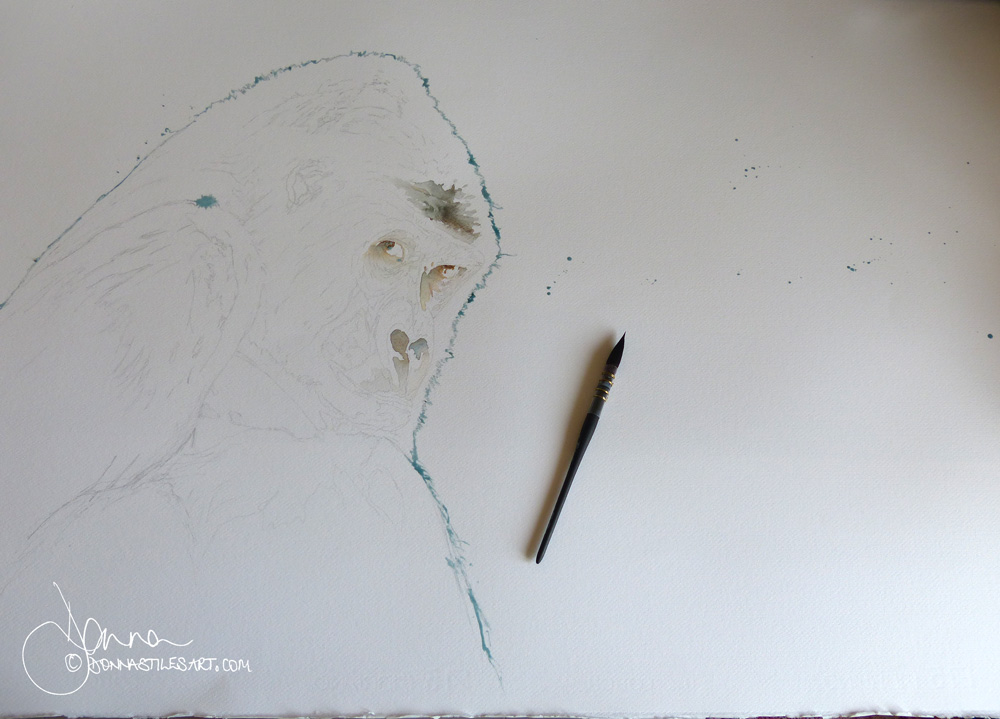
My first transparent watery washes are always the ones I love the most: the delicate subtle nuances in changes of colours as the two pigments mix on the paper is magical for me.
This is where I used the Burnt Sienna. To add some underlying warmth to his eyes.
I could stop painting here. He is already talking to me!
And, indeed, we took the measure of each other on many a morning.
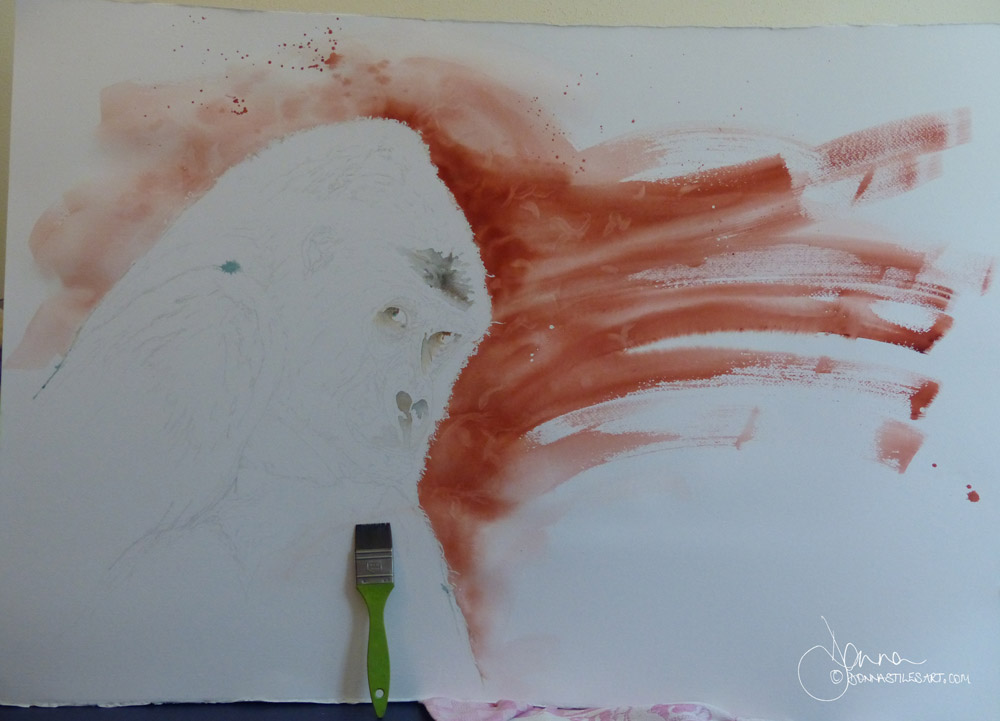
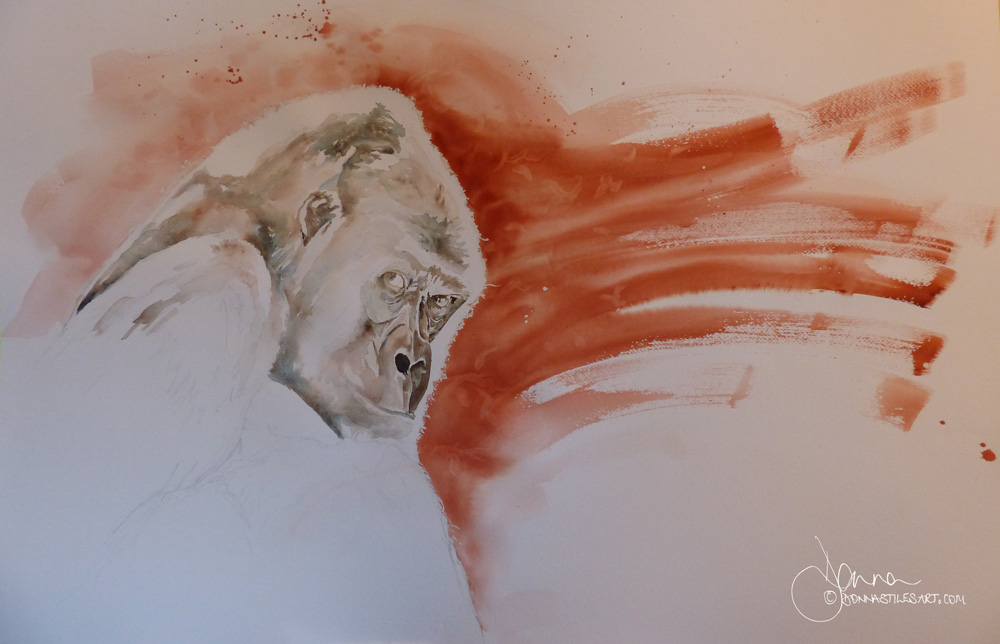
Step 3: the background
Until one evening I decide that the background I had intended for him - a wash of the same two colours with some water textures just won't hack it. It will be too much of the same.
And. So. In a moment of no going back I make a large pool of a new red I have just bought and am loving - Light Oxide Red also in the Van Gogh range - and, at the risk of wasting all that time drawing him by ruining the painting with what I am about to do, I get out my large acrylic flat brush. Fill it with as much paint as it will carry. And put some movement into the painting.
It's an incredible red: depending on the time of day and the light in my studio, it changes from a really earthy deep pillar box red, to a glowing orange.
While the paper was still damp, I lifted out some wisps with a damp/nearly dry brush and flicked a few drops around his head.
With the background now in and dry, it is now easier for me to see how relatively dark I will need to go when painting the gorilla.
Step 4: painting his face and head
Time now to paint his head. Using the same combination of Burnt Umber and Prussian blue.
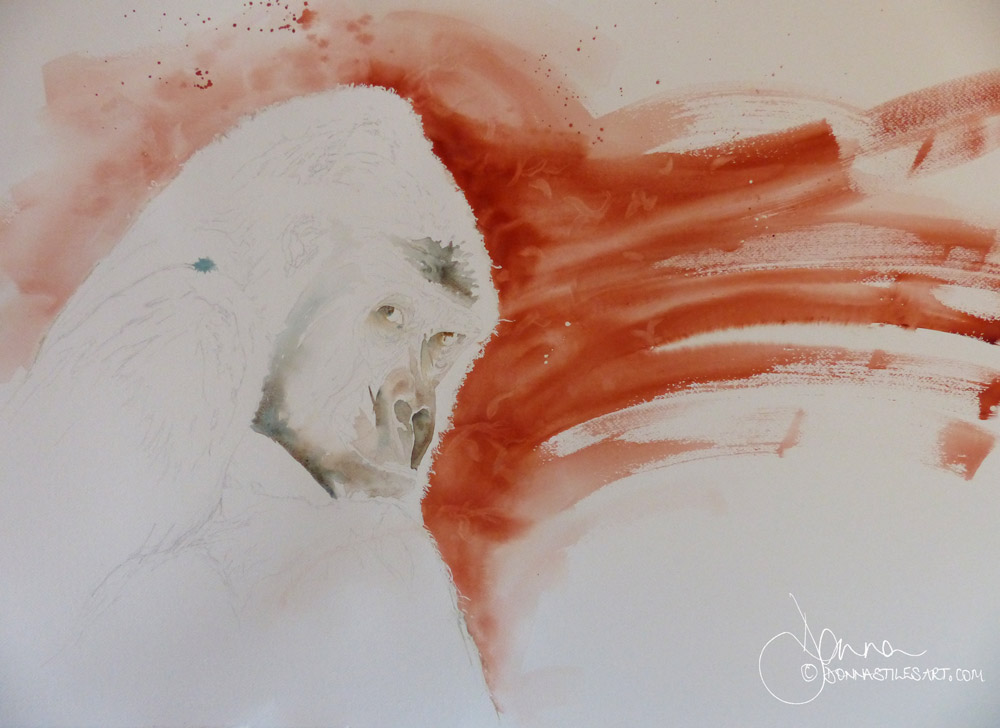
Transparent layer by transparent layer. Allowing each to dry thoroughly before applying the next.
Step 5: the "ugly ducking" stage!
Then his upper body. This is when the painting went through its "ugly duckling stage"! They all do. You just have to trust and push through it. Best too to walk away when that happens and come back to the painting fresh the next day.
I didn't take any photographs as it happened. Just this one when it was all done.
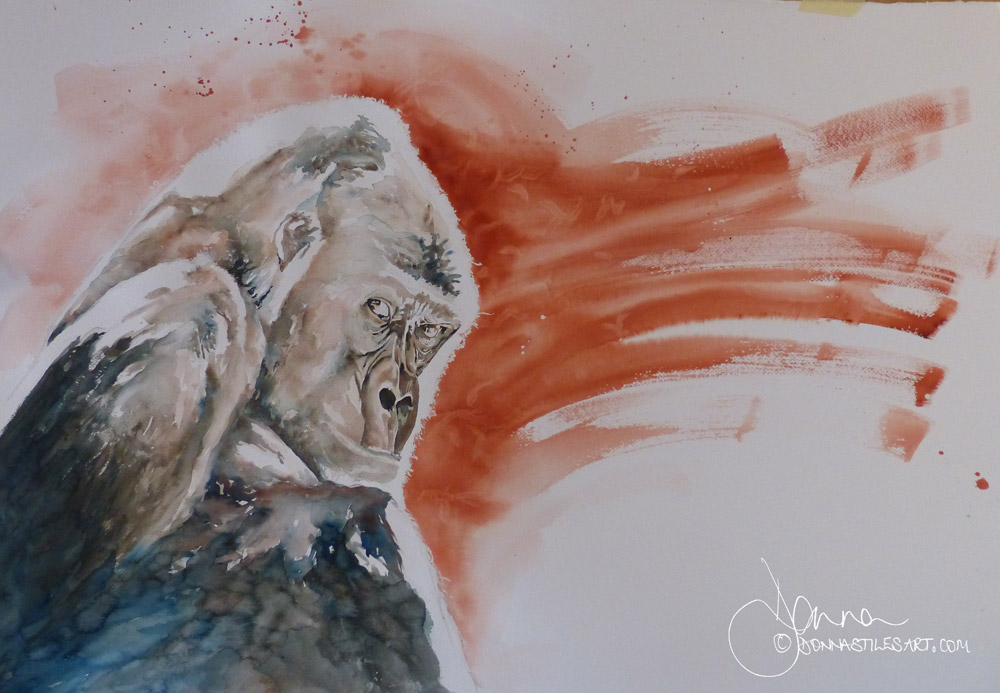
Step 6: adding tonal strength to face and upper head
With his upper body painted in and as dark as I want it to go, I needed to return to his face and head and increase the tonal strength with additional layers. Being careful not to completely cover and loose the delicacy of those underneath.
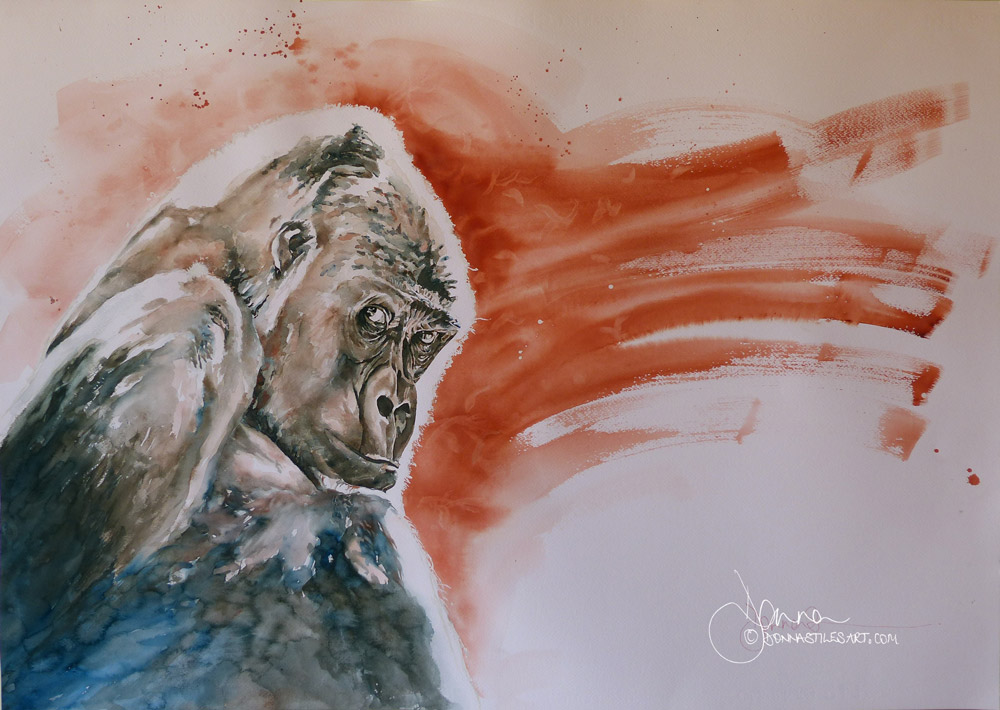
And here he is, finished.
My "gentle giant" watercolour gorilla
A gentle giant who is keeping his thoughts to himself. Until the right moment when what needs to be said is said. Just like my dad did.
The watercolour brushes and paper I used
The watercolour paper
A full sheet of Fabriano 5 watercolour paper.
The watercolour brushes
I painted him with my Tintoretto 1407 Size 6 synthetic Vajo Kazan brush that is a masterpiece of function and design. And oh so beautiful.
For the final details around the eyes I used the excellent free brush that came with my Royal Talens Van Gogh watercolour set (the Van Gogh selected filament 191 No.6 travel brush). Not because my Tintoretto with its incredible fine point isn't fit for fine detailed work, it is. But because this brush has a fantastic fine point and holds considerably less water than the Tintoretto brush and so there was less likelihood of me depositing too much pigment in very small areas.
Starting out in watercolour and want to paint captivating portraits?
Sign-up for my latest tips, secrets, and terrific tutorials to get you through the disappointing phase faster and painting the portraits you want to.